Building a "99%" DLP Policy


No DLP solution on the market, including Microsoft Purview, can guarantee 100% detection of sensitive data exfiltration.
You could argue that Exact Data Match (EDM) solves the precision problem, but EDM requires exact input formatting, rigid schema alignment, and constant upkeep. Any drift between your real-world identifiers and the uploaded dataset breaks detection entirely.
You might also assume that using only High Confidence SITs is the best way to protect against data loss. But, what if someone shares unformatted SSNs or omits keywords like ‘SSN’? What if they split the data across messages? These edge cases are common, and dangerous.
Only in the most controlled, low-variability environments will DLP policies perform accurately out of the box.
As Data Security professionals, we need to account for the accidental just as much as the malicious.
You won’t catch everything, but you can catch almost everything. This method casts a wide net without disrupting workflows or flooding your incident queue. And if you're only able to implement one Purview feature today, make it one that scales. Layering in labeling, auto-labeling, and Insider Risk Management over time strengthens the fabric.
But start here.
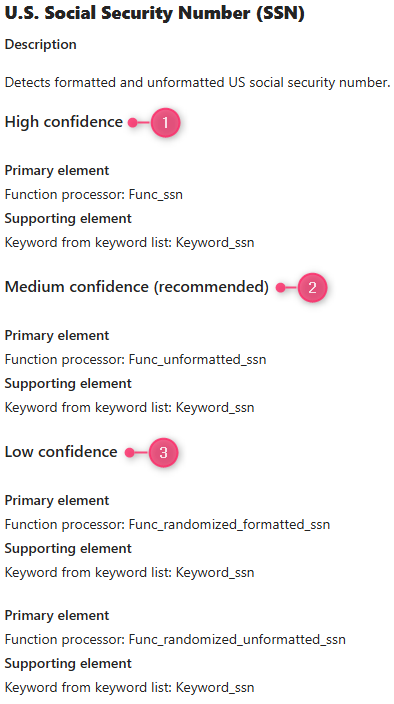
SIT Confidence Levels
First, some preliminary knowledge.
If you're familiar with building DLP policies in Purview, you probably know that every Sensitive Information Type (SIT) has associated confidence levels. Simply put, you can think of these confidence levels as accuracy levels.
A Custom SIT
To fine-tune our detection logic, we’ll need more control than built-in SITs allow. Because built-in SITs can’t be edited, we’ll clone the "U.S. Social Security Number (SSN)" SIT to create a flexible foundation:
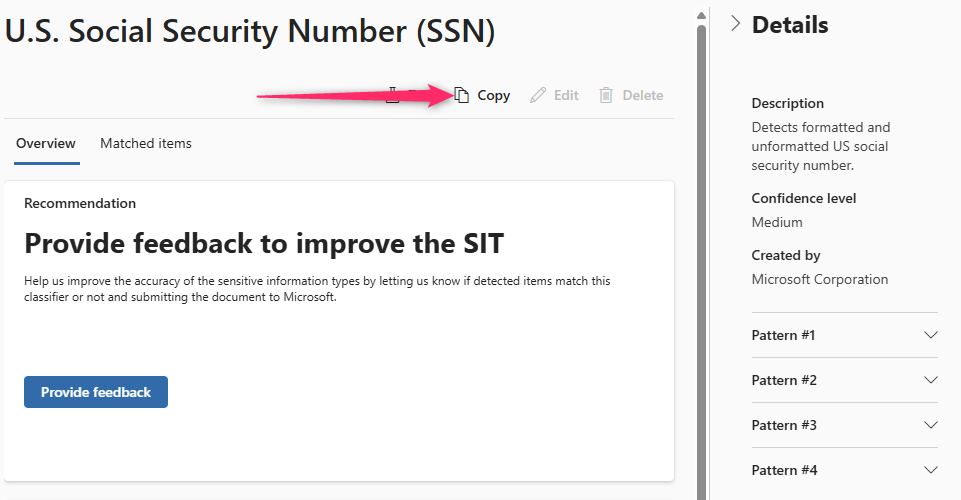
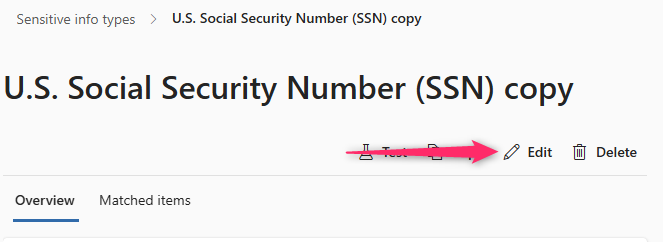
This gives us a modifiable SIT for detecting SSNs. Click the "Edit" button to begin our customization:
Step through the wizard until you get to the patterns page. Since it only contains one of multiple primary elements that we want to find for Low Confidence, we're going to delete Pattern #4:

Now, let's copy Pattern #3 a total of (3) times:

You should now have a total of (6) patterns, (4) of them being Low confidence:
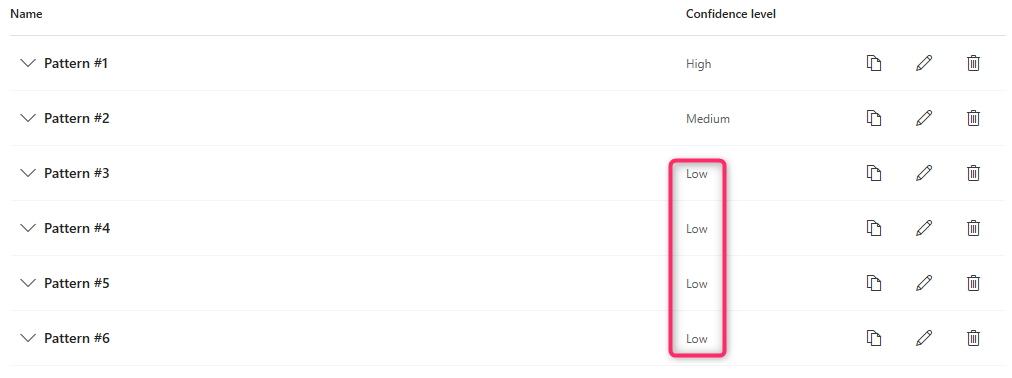
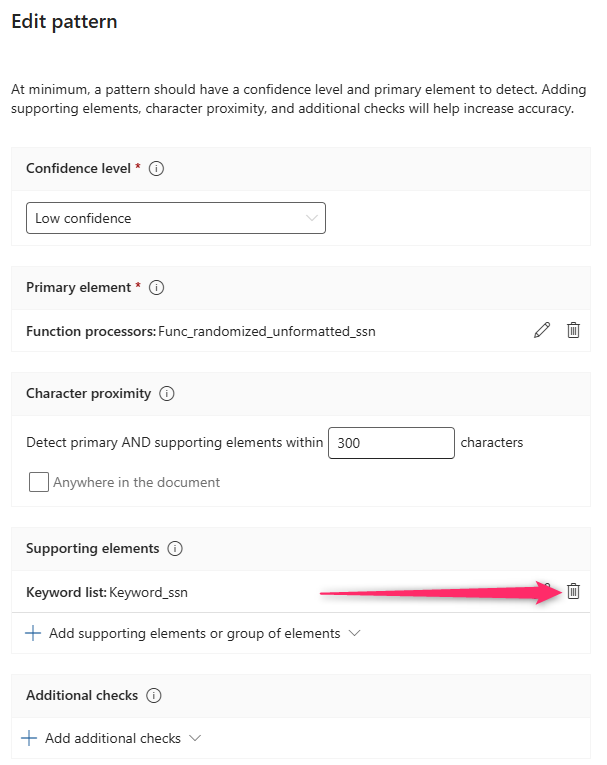
Since we're trying to cast a wide net, and the patterns for High and Medium are already looking for keywords as supporting elements, we're going to remove the keyword supporting element from every "Low" pattern:
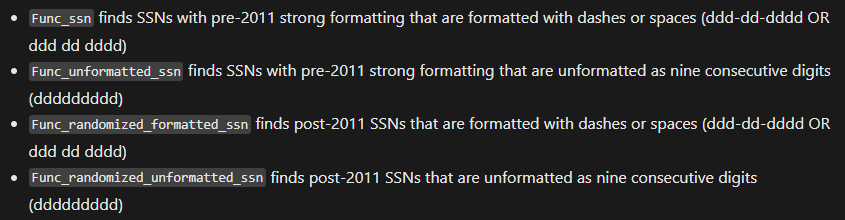
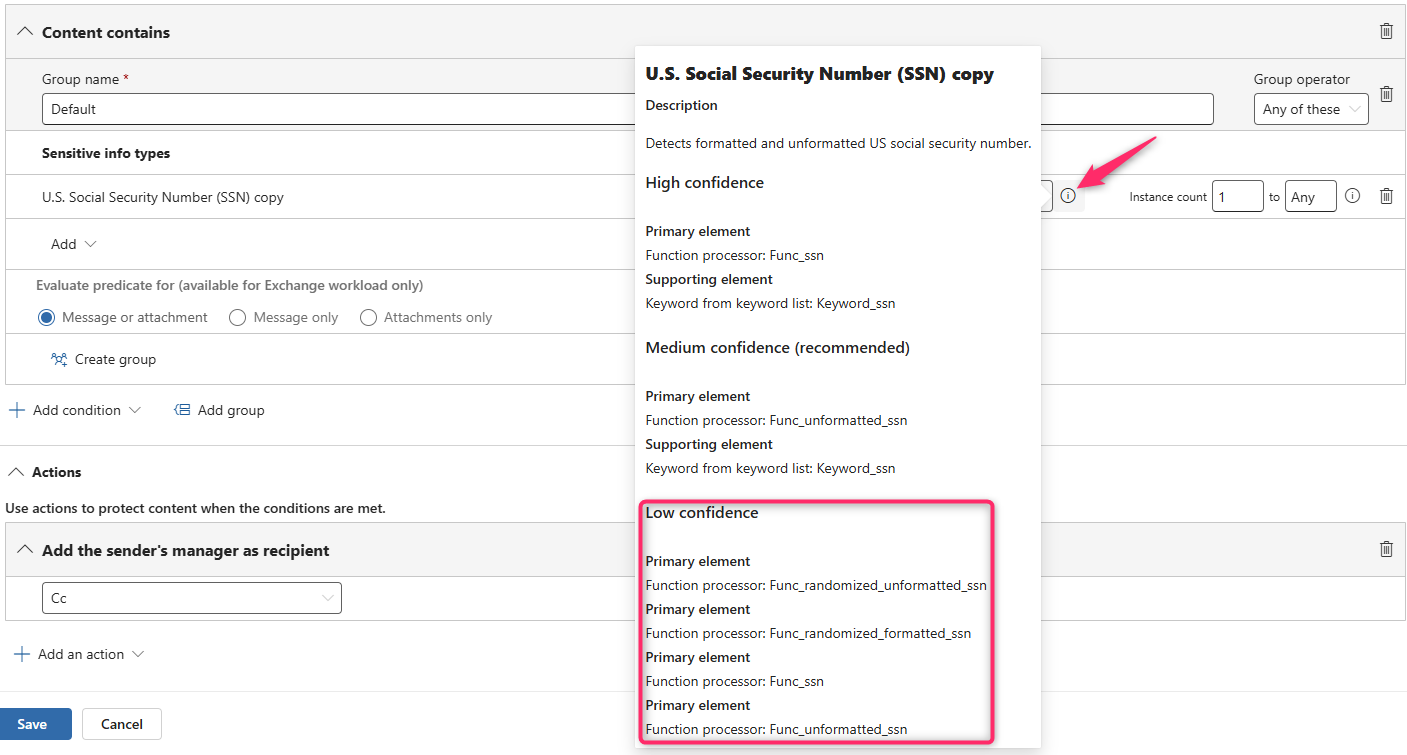
For each "Low" pattern we just created, we'll need to change the primary element so that each of the following functions are defined:
When you're finished, the Low Confidence patterns should look like the following:
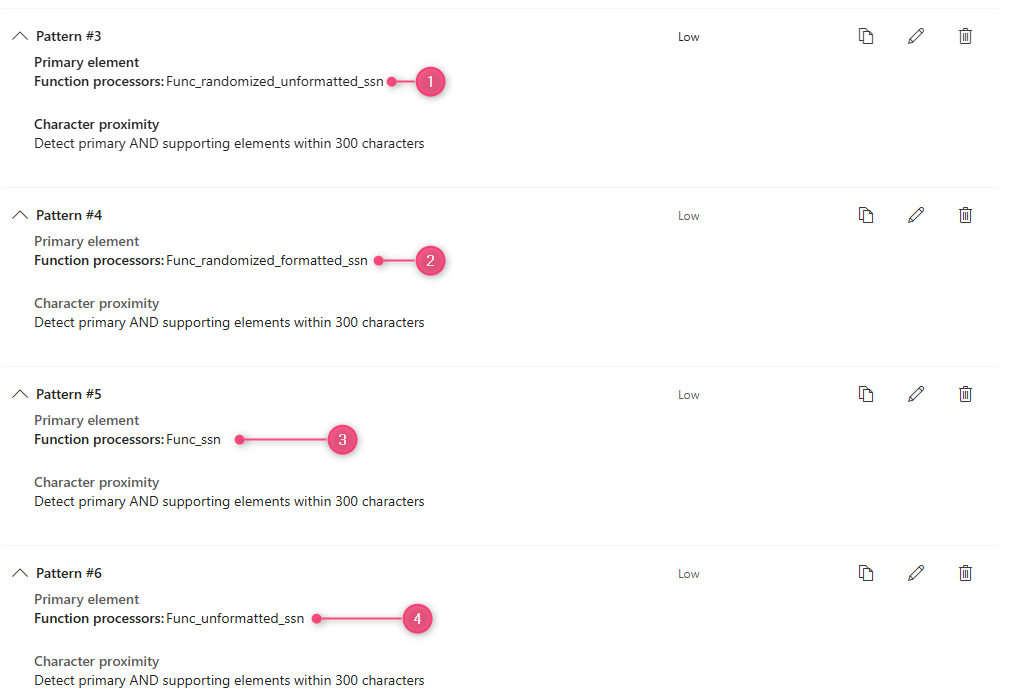
Now when you click the "learn more" button next to your Custom SIT within the DLP rule builder, you can see our new primary element structure:
Multiple rules within one Policy
Now the fun (complicated?) part.
Open up the Data Loss Prevention policies page, create a new DLP Policy, set it to the Exchange location only, and create (3) Rules → Low, Medium, and High:

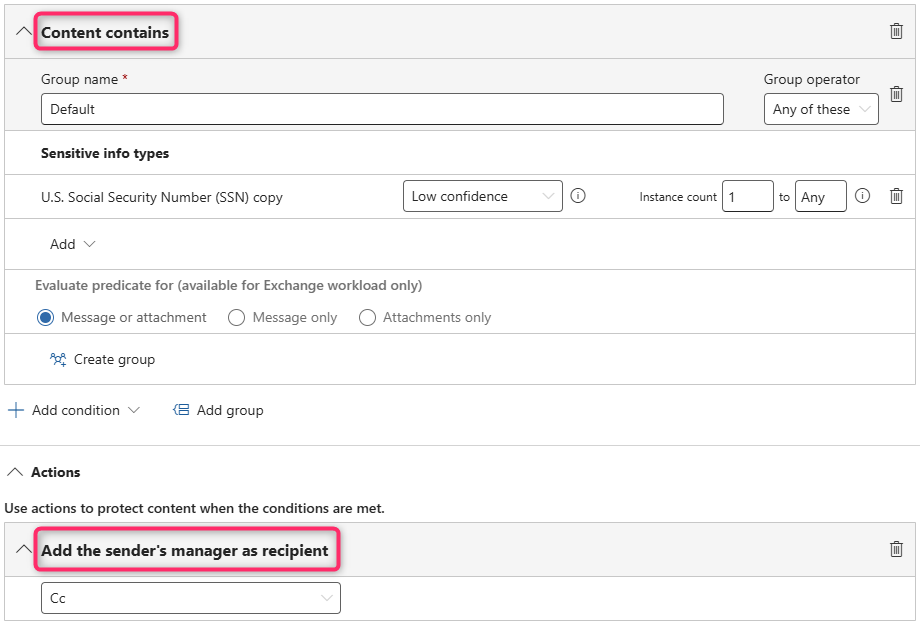
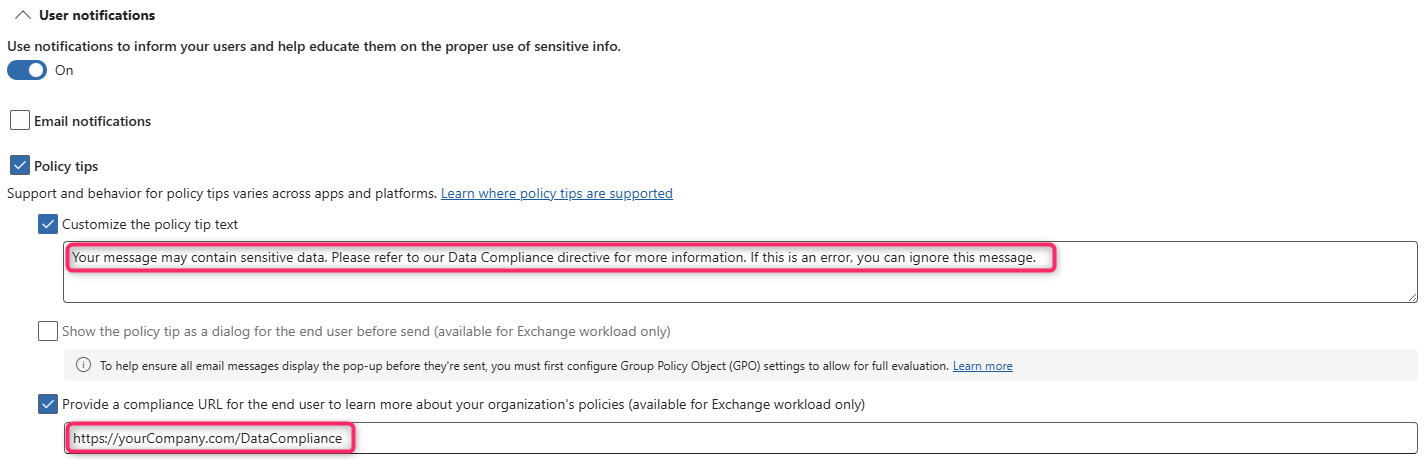
Low Confidence
The "Low" rule should look for our custom SIT ("content contains") but should only use Actions that are non-destructive in nature. I usually apply a policy tip with very light-handed language and CC the user's Manager:
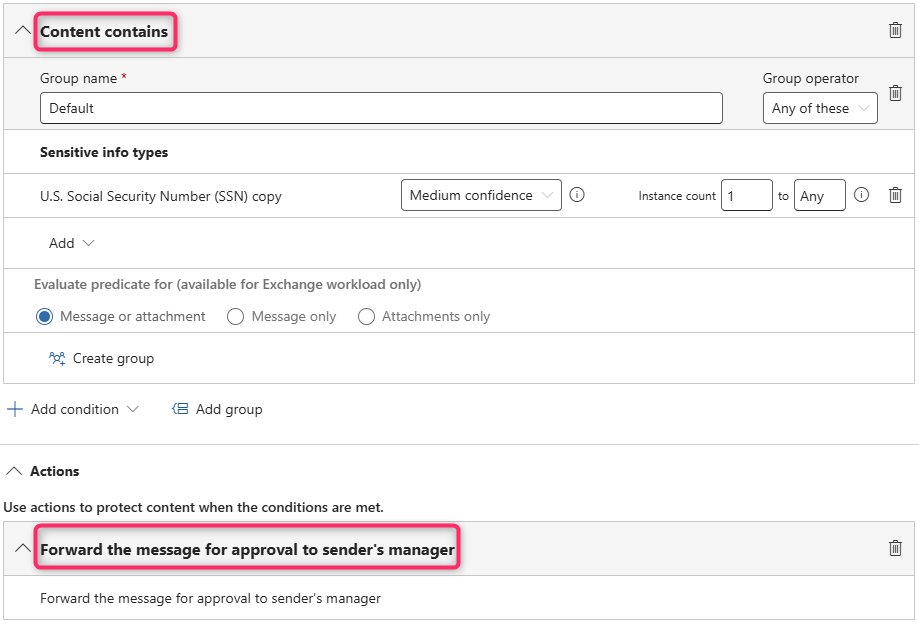
Medium Confidence
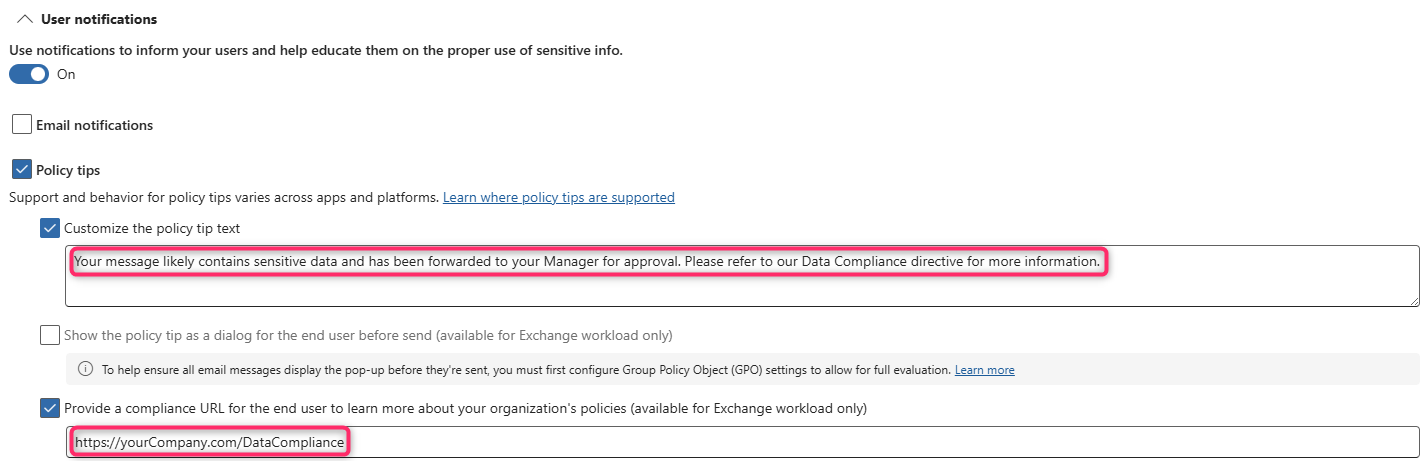
The "Medium" rule uses a more assertive policy tip and forwards the message to the user's manager for review. Viable alternatives include encrypting the message or sending it to the hosted quarantine:
High Confidence
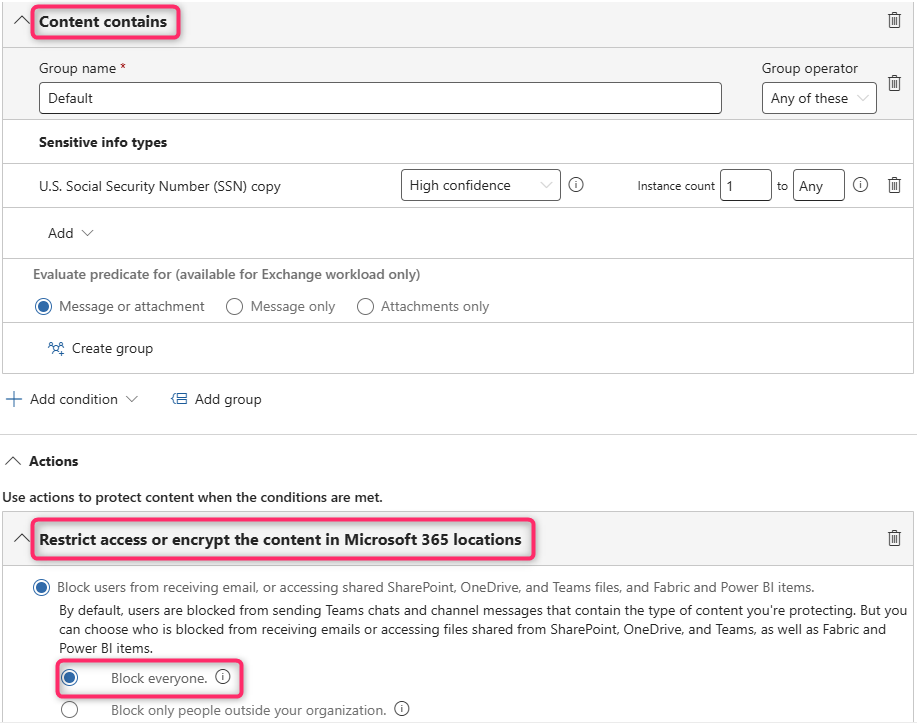
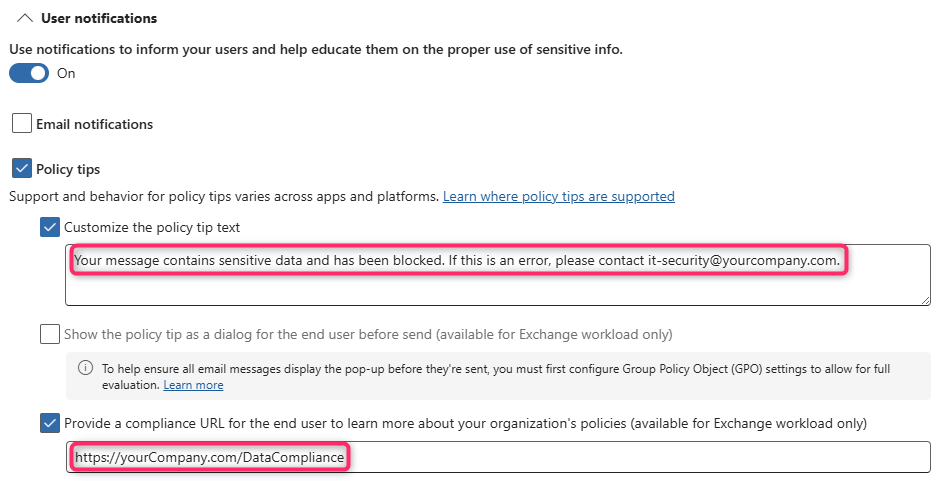
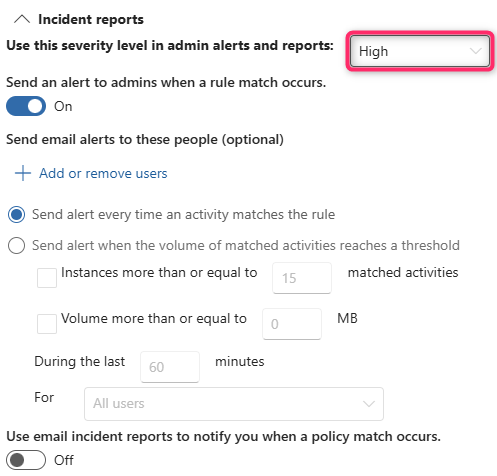
The High Confidence rule is your red line. It triggers incident reports and enforces hard-blocking actions across M365 workloads, creating immediate operational friction for attempted exfiltration:
Now that you've built your (3) rules, you should publish your DLP policy in Simulation Mode (disable Policy Tips for now).
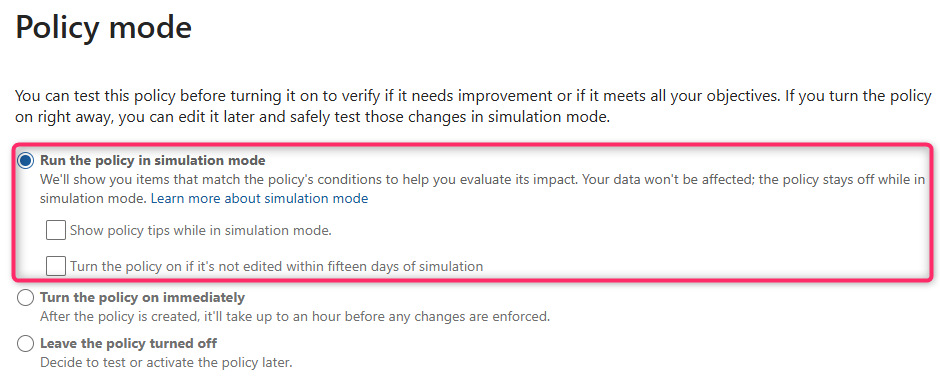
Let it run for 24 to 48 hours, and then review the hits in the Activity Explorer.
Before we adjourn...
Remember, real-world DLP lives in nuance. The "99%" method described in this post will bolster your defenses until your broader Data Security architecture reaches greater coverage or complexity.
And, if you need more help, you know where to find me 🙂